Count’s Castle
Results: Designed and created a blockmesh of a 3D area a user can intuitively navigate from beginning to end.
Team Size: Solo
Development Period: 4 weeks
Tools: Unity, Maya

Project Goals
This is a final project I did in my Level Design course instructed by Bill Morrison.
The brief for the project was to employ the design processes to…
Quickly Concept
Plan
Iterate
Create a fully playable 3D space a player character could walk through from start to finish by the level’s design alone.
Explicit indicators of guidance were strictly not allowed such as worded signs, arrows, or NPCs giving you explicit directions.

Concept Curation
This idea curation session was not meant to take very long. I wanted to spend a very large chunk of the time designing and creating the level.
I employed a rapid-fire tactic. Using this technique, I netted myself a few good options to choose and move forward with.…
Write 1-3 sentences about the idea
Write what I like most about the idea
What I don’t like about the idea
Give it a 1 out of 10 ranking based on how compelling it is to me.
Setting the Scene
The image says it all but briefly…
It will be a lush countryside (implied to be set in an Asian area)
A foreboding castle always in view
Abandoned fortified structures littering the grasslands
During sunset/late evening gives it a bit more of a blissful atmosphere while you walk through nature.


Research & Moodboard
With that, I moved on to creating a mood board for the experience. I researched to include references for notable sections of the experience, general mood pictures, and references for the castle itself which will be a part of the experience itself.
I took more eccentric elements for the castle and for nature: very tranquil. Hopefully, this would create a notable dichotomy when moving from the outside countryside into the foreboding eccentric castle.
I also took some cues from my favorite film Lupin III: The Castle of Cagliostro. The film had beautiful environments of old fortifications in nature and I would be forgone to not use it as a reference.

Points of Interest
I had some ideas for the focal points in the experience that players would come across throughout…
Of course, the castle was the biggest and most important focal point of the entire experience. It’s meant to be immediately visible from the beginning out in the distance–beckoning you.
Smaller areas serve as more minor focal points and are often areas that reward you with a new view of the environment (and of course the castle as well). This was the basis of the player experience for this project.
I did want to make it an enjoyable experience in the details. I even positioned the sun in the world in such a position that the light should be guiding you toward the castle by drawing your eyes.


Layout Planning
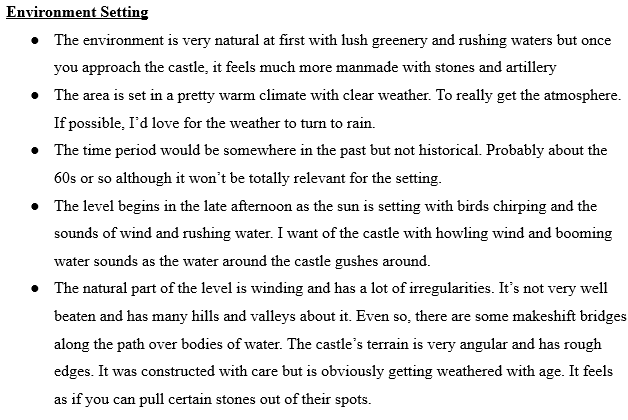
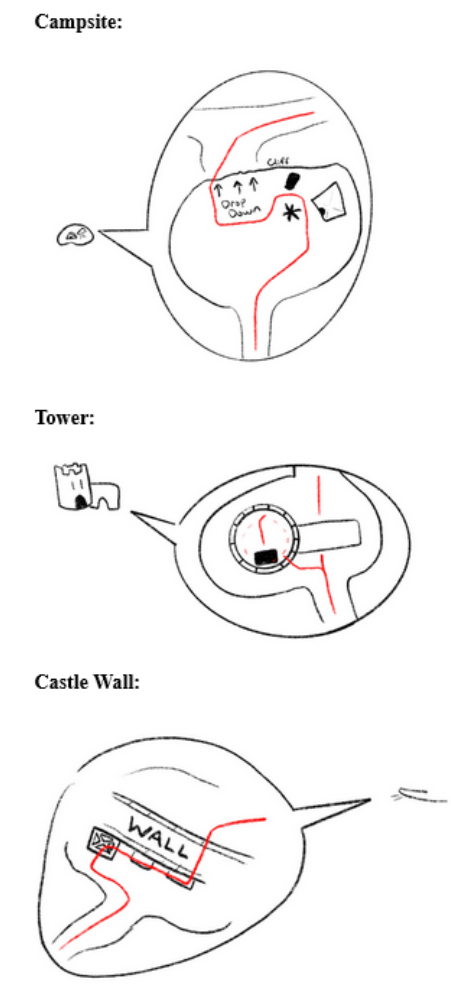
Then finally came the written planning for the layout.
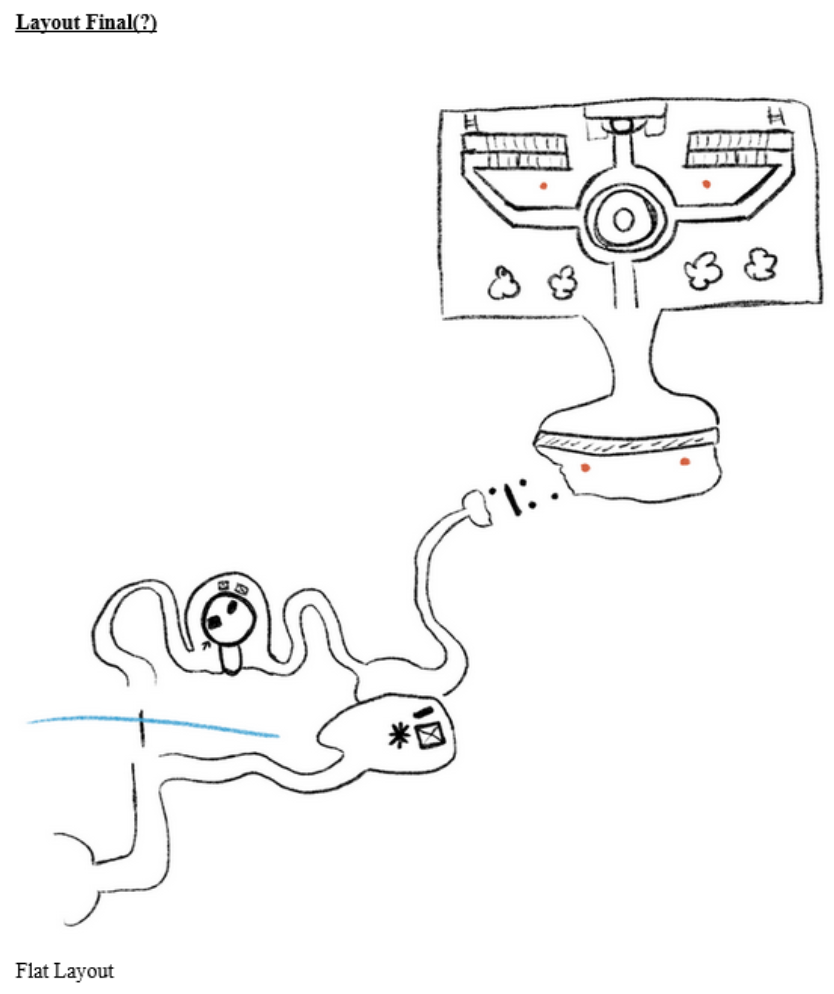
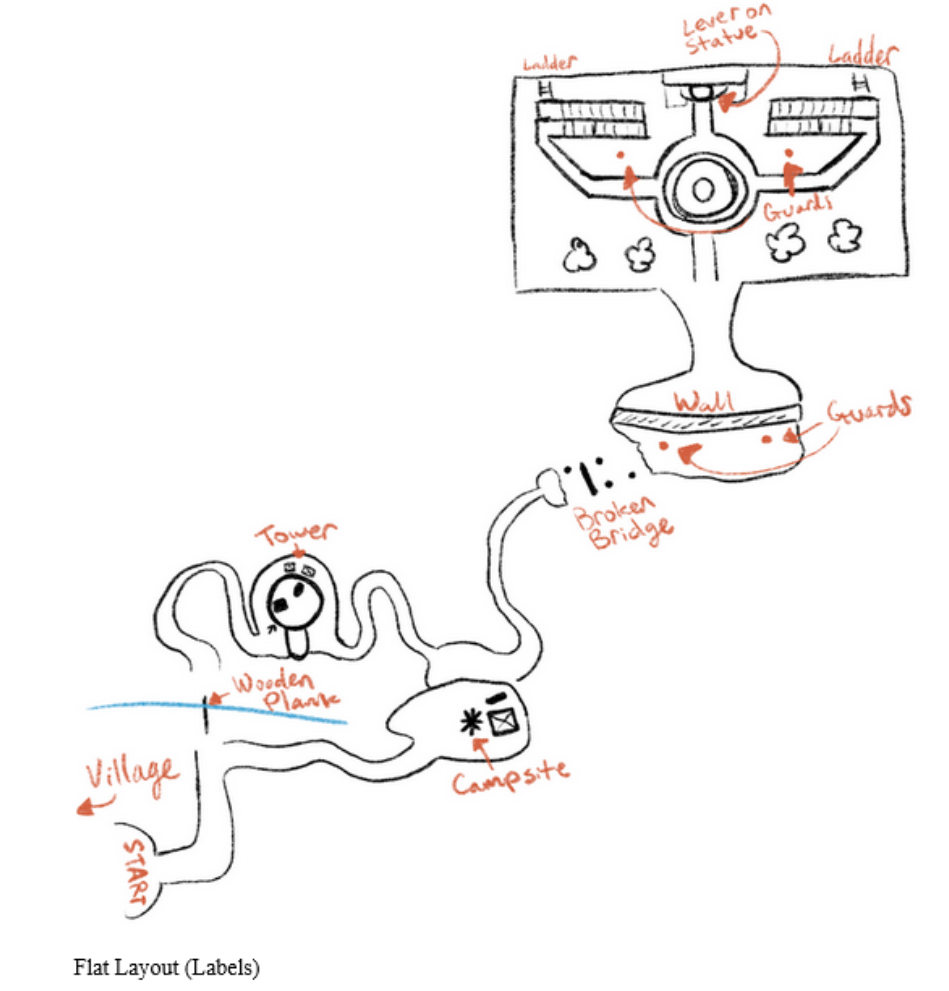
Below are the actual images I drew out for the layout. At first, the design was very linear with minimal variation in the path between focal points.
While it was the most straightforward and would’ve fulfilled the project requirements, it just wasn’t an interesting layout and I wouldn’t accept it.
Instead, I took the ideas for the focal points of the experience and split them into two different paths which will lead to different experiences before converging again later. Depending on which path you take, you are rewarded with a different unique view of the surrounding landscape and castle. This added a much more interesting layer to the experience I felt.
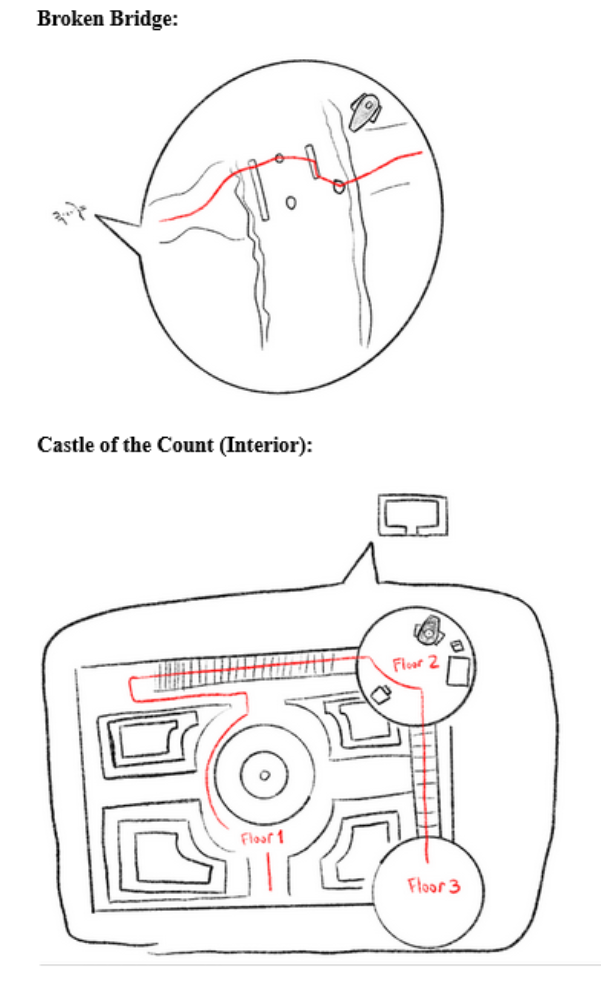
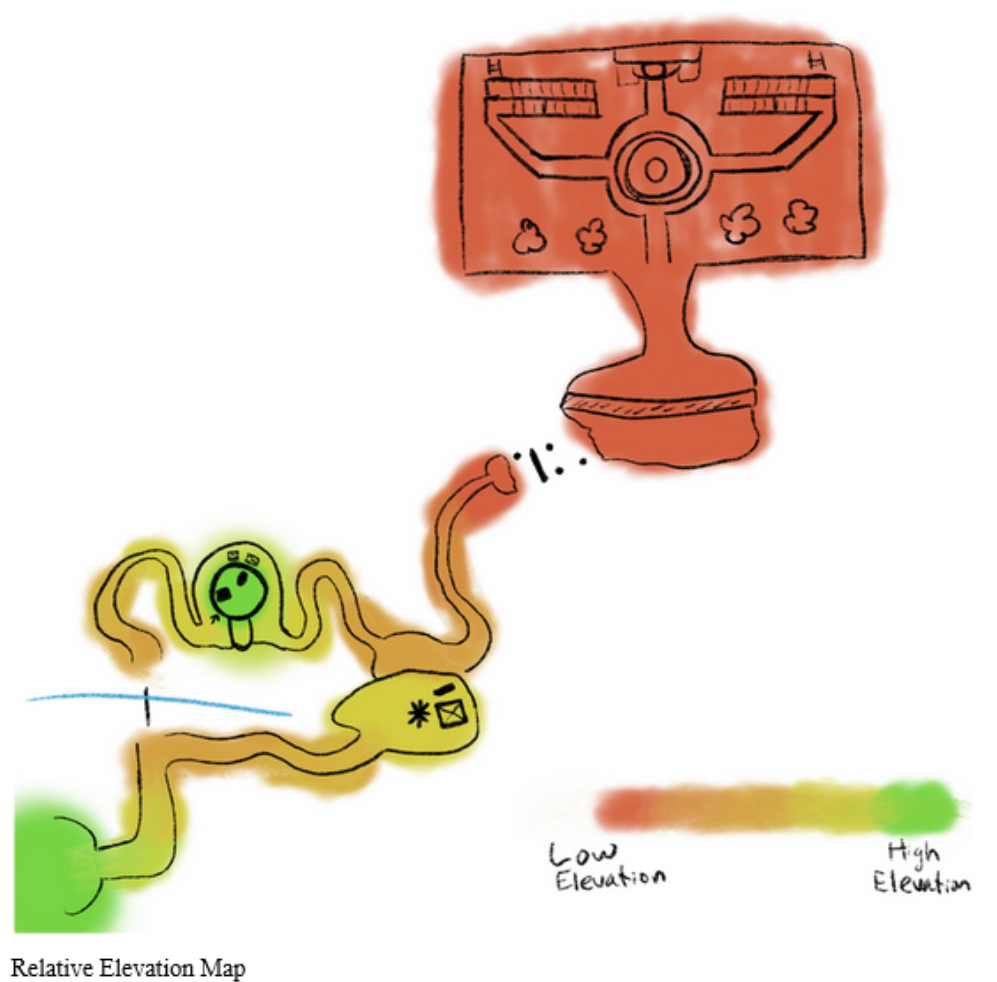
After some reworks to try to make the experience enjoyable and guide the player where I want, I solidified the topography and viewpoints I envisioned for the experience.


Actually Making the Darned Thing
The longest section of the project was modeling and playtesting the experience.
Using Maya, I modeled the space that we had begun to be taught how to use during that course.
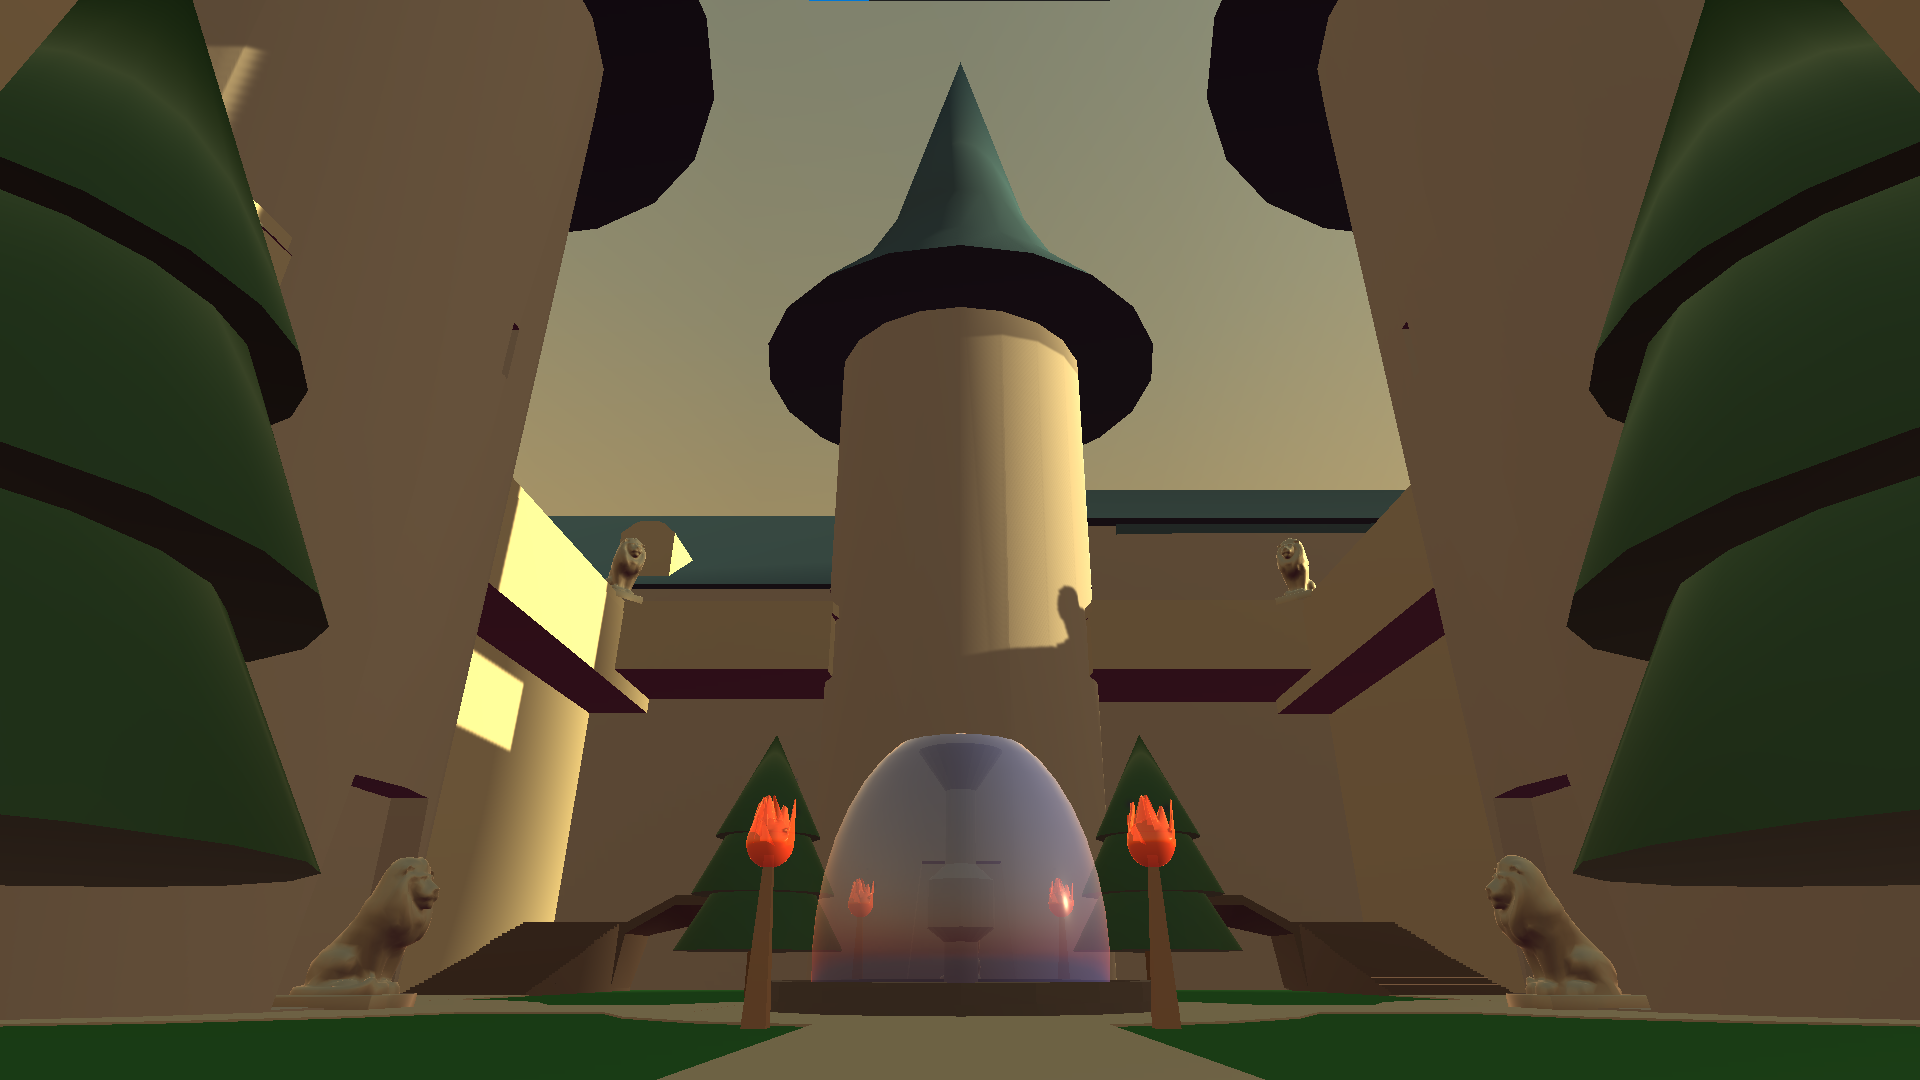
This was a great opportunity to become more familiar and comfortable with the tool so I could white-box other 3D projects in the future. After a few weeks, I was able to white-box the entirety of the planned space.
Finally, I completed the project by adding audio and extra visuals to make my vision clear in the product. The audio I included was essential to make the space feel more alive and really sell it–especially for the outside nature.

A Rewarding View
Once the player entered the castle, made their way to the stairs inside the castle’s courtyard to the second floor, and then climbed up the tallest tower of the castle, they are then rewarded with a high-up view of the space they just explored along with a distant view of a spectacular mountain in the sunset lighting. Capping off the experience with some satisfaction.